Archive for the ‘graphics’ Category

Rendering rings of teleportation

Wednesday, June 4th, 2008

Rings of teleportation are very handy things to have around. The surface bounded by one ring is equated with the surface bounded by the other, so if you put something through one ring it will come out through the other. (Like the portals in "Portal", but more portable). They don't exist, of course, but this technicality doesn't prevent us from drawing pictures of them.

Writing code to render these things is an interesting exercise. It's easy to do with a ray tracer - if a ray intersects the disc inside one ring, just continue it to the equivalent point on the other ring.

Once that's working, you can put the rings side-by-side so that light goes around in circles - if you put your eye point in the middle you can see an infinite tunnel.

A trick you can play is to reverse the orientation of one of the rings so that you look through one ring, out of the other to an object, the object will appear to you to be inverted, as in a mirror image.

Another trick is to make the rings different sizes, or shapes. As long as there is a 1:1 function equating points on one surface with points on the other, it works fine.

However, having rings of different sizes or non-circular shapes opens the possibility of putting one ring through the other. What happens then? It seems like the "infinite tunnel" then becomes a real thing rather than just an optical effect, but where does the second ring exist in real space? It seems that the only place it can appear is through the other side of the first ring, but that would mean that every point in space appears in an infinite number of places - this seems like it would have rather drastic consequences.

So it seems more likely that the second ring would be prevented from going through the first somehow (perhaps a ring edge would get in the way).

What I want from an HDR workflow

Tuesday, June 3rd, 2008

Once I've got my HDR camera and my HDR monitor, I'll need new photographic workflow applications to get the images looking the way I want them. I expect that there will be a few parameters that I'll almost always want to tweak, much as I almost always re-crop my photos at the moment. These parameters are likely to be:

  • Colour balance (2D slider)
  • Exposure (slider)
  • Dynamic range compression (slider)
  • Tone mapping radius (slider)

The last two of these reproduce the functionality of current HDR applications, allowing creation of tone-mapped images for non-HDR output (like printing, or legacy monitors).

The high dynamic range revolution

Monday, June 2nd, 2008

Currently some people are making beautiful HDR images like these. This takes an input image with a high dynamic range (often composed of multiple exposures with different exposure times to get good colour resolution over a wide range of brightnesses) and "compresses" the range down to monitor or printout ranges. This can give an effect similar to an oil painting (painters use similar techniques).

But such techniques will soon become unnecessary as the dynamic range that monitors can display increases. As I've mentioned before I've seen this technology in action and it's seriously impressive - the pictures are incredibly realistic, like looking out of a window. As these monitors drop in price they will become ubiquitous and then we will want to take pictures that take full advantage of them.

Shooting RAW with a good digital SLR goes some way towards this, but I think that with the new generation of monitors will come a new generation of cameras optimized for taking HDR images. This might be as simple as reading the sensor several times over the course of the exposure, or it might be a completely new sensor design.

With new monitors and new cameras, the entire graphics pipeline will be re-engineered for HDR.

Photographic workflow

Sunday, June 1st, 2008

The workflow that I use for the photographs on my website has remained pretty much unchanged for many years.

  1. Copy the photos from the card to the computer and then delete them from the card.
  2. Open the folder of photos in ACDSee and delete any obvious duds.
  3. Open all the photos in Paint Shop Pro 4 (yes, I know it's ancient but it works well, I know my way around all the tools and it's fast).
  4. I look for similar photos and close the ones that are redundant or unattractive, eventually whittling it down to the set of photos that will form a nice album page.
  5. I rotate (sometimes by arbitrary angles) and crop. Sometimes I'll adjust brightness and/or contrast to save a poor photo if there's something in particular that I want to have a picture of. Sometimes I'll use a more sophistical program like Photoshop to remove redeye or do other colour manipulations.
  6. Very occasionally I will use the clone tool to erase something that I don't want in the photo.
  7. I'll resample the photos to the appropriate size and save them as jpgs.
  8. Finally I'll manipulate the directory listing in a text editor to create the html file, add captions and upload the lot.

Someday I'll trade in my trusty Olympus C3000Z and get a nice digital SLR. But I might wait a few years because the high dynamic range revolution is coming. More about that tomorrow.

High density mouse pointer

Wednesday, May 9th, 2007

Many techniques have been invented for making the mouse pointer more visible. One is a little animation of circles radiating out from it when you press a "locate" button, another is just making it bigger. Yet another is adding "mouse trails" showing the position the pointer was at over the last few frames (though this has the disconcerting effect of making your pointer appear to be a snake). One which I think has been inadequately explored is making it "high density". Normally when you move the mouse the operating system erases the pointer from the old location and plots it at the new location (doing nothing in between) if you move the pointer around quickly in a circle it the pointer seems to appear at discrete locations.

I think it would be better if, in any given frame, the operating system plotted the pointer at the position it was at in the last frame, the position it is at in the current frame and everywhere in between. This would give the impression of a "streak" as you moved the pointer, or a solid circle if you moved it in a rapid circle, as if the pointer is plotted much more often than once per frame - more "densely" in other words. It would be kind of like mouse trails done properly.

Computer graphics of the future

Sunday, August 28th, 2005

Back in secondary school I was fascinated by the concept of ray tracing. At first I thought it was the ultimate rendering algorithm - that photographic-quality computer-generated pictures would be possible just as soon as we managed to accurately model the way light reflected or was refracted by the surfaces we wanted to visualize.

Then it occurred to me that maybe shooting rays from the eye back to the light source was not necessarily the best way to go about rendering objects. What if we shot rays from the light sources to the eye instead? The trouble with that approach, I quickly realized, was that most light rays are absorbed by other surfaces before reaching the eye, so you would have to shoot an awful lot of photons to get anything approximating an image.

The next step in this mental process was to imagine combining forward and reverse ray tracing - shoot rays from the light source and bounce them around a bit to figure out where the light ended up in the scene, and then shoot rays from the eye into the scene (using the normal ray-tracing algorithm) to actually render the image, using the first set of rays to figure out which parts were lit up, which were in shadow and so on. Unfortunately I never got around to implementing this idea.

Turns out that someone beat me to it anyway - Henrik Wann Jensen had already invented photon mapping some years before and rendered some beautiful images of Cornell boxes, caustics and architectural models. All the good ideas have already been thought of...

If computers continue to get more powerful at the rate they have been, in 10-20 years it should be possible to render photon mapped images and model the subsurface scattering needed to render translucent objects (like people) all in real time. By then we will all have high dynamic range displays (I saw one of the BrightSide displays at an MS research techfest earlier this year - it was awesome) and will have sophisticated procedural geometry algorithms for rendering all sorts of complex natural objects. These technologies (especially combined) will be able to generate some truly awesome images, increasingly difficult to distinguish from real life.

The future of computer graphics looks good!

Fractal gallery

Friday, November 2nd, 2001

For those of you who can't get enough of fractal pictures, here are some of my favorites. The orbit types were created with programs of my own devising, written with DJGPP and Allegro. The others were created with Fractint, at 1600x1200 and resampled to 800x600.

Ultima maps

Friday, November 2nd, 2001

Warning! You will find major spoilers here if you haven't completed these games yet!

Maps from Ultima VI

Britannian surface

Dungeon level 1

Dungeon level 2

Dungeon level 3

Dungeon level 4

Gargoyle surface


Maps from Savage Empire

Eodon Valley surface

Myrmidex caves

Surface level caves

Underground city of Kotl


Maps from Martian Dreams

Mars surface

Mines

Dream World

Dream World

Mine and underground parts of Martian city

Coal mine and power plant


About the maps

The scale of these maps is 1 pixel per step. The data is stored in the files MAP and CHUNKS and isn't too difficult to decode, but colouring is fiddly. To colour these maps I modified the MAP and CHUNKS files to find out what tile each number corresponds to. The tiles are as follows:

Ultima VI (left), Savage Empire (centre), Martian Dreams (right)

Note that these aren't all the graphics from the games because there are two types of tile. The other tiles are object tiles, the positions and types of which are stored in the files in the SAVEGAME folder. Going to a finer scale would be rather pointless without deciphering this data. For example, you can see even at this scale that the buildings are empty.

It would be really cool to make a 1:1 scale map including all the objects, equivalent to the Eagle Eye spell. Unfortunately it would be a bit too large for your web browser - stored as a GIF file each large map would take up at least 70Mb! However, it would look nice scaled down (even better than these maps at the same scale) and it would be good to have a program that would let you scroll around and zoom into/out of the map. It would also be nice to create a census of all the characters in the games and find out the purpose (if any) of the message "Winona Ryder is a really hot babe" in Savage Empire and Martian Dreams. I may do these things someday.

Surprising stuff the maps revealed

I was surprised that the maps in Ultima VI actually form a three dimensional structure - if you scale up the small maps to the size of the large one then all the cave entrances, holes and ladders line up. The same is not true of Savage Empire and Martian Dreams. In fact, in Savage Empire the "level" isn't even related to the 3 dimensional configuration of the world.

The authors embedded hidden information into the maps as you can see - SMB (Stephen Beeman) in Savage Empire and Gryphon (Philip Brogden) in Martian Dreams. There are also some hidden areas in the poles of Mars. I don't know if these have any purpose in the game or not - I'll tell you when I've completed it.

Although the "shape of the world" is supposed to be flat in Ultima VI and Savage Empire and spherical in Martian Dreams, the true shape of each world is a torus or doughnut. If you could walk off the left you would reappear at the same place on the right, and if you could walk off the top you would reappear at the same place on the bottom. In fact you can see this effect in the Savage Empire maps: there is a river which disappears off the top and reappears on the bottom on the surface, and the rightmost walls of the underground city are on the left. This is used in Martian Dreams to create a cylindrical (okay, spherical...) world rather than a flat one.

Savage Empire uses only 4 of the 6 levels. Level 5 is empty but level 6 contains the gargoyle world straight out of Ultima VI! It doesn't quite make sense because some of the chunks (8x8 blocks of tiles) are different, but it's clearly the same map.

Links

These maps were inspired by those of Otmar Lendl. Check them out, he's got some of Ultima IV and Ultima V as well.

Mobygames entries for Ultima VI, Savage Empire and Martian Dreams.

Bartholomew Melnicki has gone much further and started plotting objects on the maps. Check it out!

Image editing

Wednesday, July 12th, 2000

(for Ken, and all the other Kens out there)

I recently got an email from someone who wanted to send me some images that he had scanned in with his new scanner, but was having trouble sending the 8Mb BMP or TIF file by email and was even considering wasting some trees and using (shudder) snail mail. This is a common sort of problem for people new to scanning images and/or sending images over email.

I had been planning to write this tutorial for some time, since I quite often get sent over-sized, under compressed images by email. So, when I got the email from this guy I decided to write it there and then (and dedicate it to him), so that next time someone asks I can just point them to it. I hope you find it useful and that it will help you to become a more responsible citizen of cyber-space.

This tutorial doesn't cover how to do scanning (see the manual which came with your scanner for that) or how to attach images to emails (see the documentation for your email program for that). What it does cover is the most common things you should want to do in between - cropping, image file formats, changing resolution and reducing colour depth. I usually use Paint Shop Pro for these sorts of tasks - it's an excellent general purpose image editing program with support for many file formats as well as TWAIN-compliant image sources (which is pretty much any scanner or digital camera software you care to name). Paint Shop Pro can be downloaded from JASC. All the examples in this tutorial use Paint Shop Pro. If you use different software, you'll have to do some playing around with it to find the equivalent commands (assuming those commands are supported).

Don't use TIF or BMP format unless you want to use a picture in a program that only understands those formats. Neither TIF or BMP use any compression. Their only virtue is that they are easy from a programming point of view.

The file format you want depends on the content of the image. GIF is good for images such as cartoons or diagrams, which have areas of solid colour, but it doesn't support more than 256 colours. It's particularly good for websites, since pretty much every web browser since the beginning of time supports it. It can also do animation and transparency - great for making websites. Unfortunately, people in the US are at a disadvantage since Unisys (who own a patent on the GIF format) have taken advantage of the USA's very bad patent laws to attempt to charge anyone who makes a GIF file. This lead to the "burn all GIFs day" when websites were encourages to exchange all their GIF images for superior PNG format images. People in other countries are still free to use GIFs if they like, though, and since GIF still has some advantages (it is supported by more browsers and has the ability to do animation) I encourage people outside the US to continue using it.

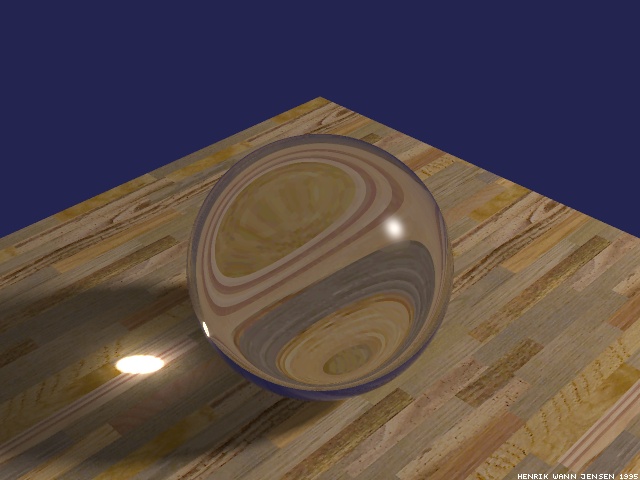
JPG (or JPEG or JIF) is good for scanned photos or images from digital cameras - it is a lossy format which means that you trade off some of the quality of the image to make the file smaller. Usually with photographs you can get tiny files with no noticable loss in quality (in other images the loss in quality may be more noticable).

PNG is a relatively new format which means that not many programs support it yet. It's a very good lossless general purpose format, much like GIF but with better (albeit slower) compression and support for more than 256 colours. JPG can be used with most web-browsers and PNG with the more recent ones. Most of the other formats provided by Paint Shop Pro are only provided for compatibility with other software which has a more limited selection of file formats (to edit the Windows startup, shutdown and "It is now safe to turn off your computer" screens for example, it is necessary to save a BMP image).

Just as important as choosing the right file format, though, is to crop the image properly and to reduce the colour depth and resolution of your image before saving it. Scanners normally produce very high resolution images (mine is 300dpi by default) in 16.8 million colours. This produces very big files (about 264Kb per square inch).

Use "File", "Aquire" to scan your image in the usual way. 300dpi and 24 bit colour (or "Truecolour" or 16.8 million colours). You might want to use 150dpi if you want to scan a large image quickly. Next, select the area of the image you want with the rectangular selection tool (the button with the dotted rectangle). Then select "Image", "Crop" to remove the parts of the picture you don't want. Most scanner software does this automatically, but this technique is generally more accurate since you can zoom into the image if you want to. At this stage you can also rotate the image (using "Image", "Rotate") if you scanned it at a more convenient orientation than upwards.

The next stage is to resample the image to a more convenient resolution. If you zoom to 1:1 you'll probably notice that the detail is far more than you need - unless it's a very small image only a fraction of it fits on the screen at once (even if you have a very high resolution monitor). Use "Image", "Resample" to fix this. If your image is not in Truecolour or Hicolour, this option will be greyed out and you will only be able to use "Resize", which is equivalent to scanning at a lower resolution. "Resample" has the advantage that it uses some of the information it throws away to make the image look better - a technique sometimes known as "anti-aliasing". Resampling also works better if you are increasing the resolution, but this practice is almost never recommended - if you think you need to do this you should probably have scanned at a higher resolution to start with. The "image enhancement" techniques you see in movies where a fuzzy blown up image is made perfectly sharp and clear so that you read the piece of paper sticking out of the bad guy's pocket is actually not possible.

It takes a bit of practice to decide what the right resolution should be for your image. For the purposes of viewing something on-screen (such as on a website) having the image larger than the screen is pointless (people don't like to pan around images to see all of them, and if they zoom out it means your image was at too high a resolution). 640x480 is about the practical maximum for a website, since most people use a resolution of 800x600 on their desktop and want some space for menu bars, scroll bars and that sort of junk). If you're printing your image with a high quality printer (laser, or inkjet on glossy paper) you might want to double that. If you're projecting your image onto an IMAX cinema screen, you probably want a higher resolution still. Of course, if (in the last two cases) you find your image is blocky, you can always start again with a higher resolution.

When using the Resample tool in Paint Shop Pro, ensure that the "maintain aspect ratio" box is checked, otherwise your image will look squashed or stretched.

Next, decrease your colour depth. At the moment each pixel takes up 3 bytes of memory. Since you probably still have quite a few pixels, your file is still quite large (Paint Shop Pro tells you exactly how large in the bottom right hand corner of the window). If you have a photographic image and want to save using the JPG format, or if accuracy of colour reproduction is very important to you and you are saving in PNG format, you can (and should) skip the colour depth stage and proceed to saving the file.

You probably want either 256 colours or 16 colours. (2 is useful colours if you are dealing with a black and white line drawing in very high resolution, such as you'd want for printing out on a high quality printer). 16 colours is good if you have an image which has very few colours to start with, or you're really short on space, 256 is better for most purposes. Ensure you use an optimized palette for best results (the others are designed to make images look better for people who view web pages with a screen colour depth of either 16 or 256 colours - very few people do this these days because it looks pretty awful in any case). The next choice to make is the difference between "Nearest colour" reduction or "Error diffusion". This choice is mainly a matter of taste - try both and see which you like (you can use the "Edit", "Undo" feature to take the image back to 16.7 million colours).

From the point of view of image size, "Nearest colour" is usually slightly better. I usually prefer the way it looks - "Error diffusion" will tend to give better colour definition but can make the images look grainy. All these effects are hugely exaggerated by using 16 colours instead of 256.

Now we get to saving the file. If you're saving a GIF or PNG image with a transparent background (often done with websites - see the "AJ"s at the top of this page for example) select the "dropper" tool and right click on a portion of the background (remembering that the background must be one uniform colour. This is often another reason to use "Nearest colour" - error diffusion often gives backgrounds made up of more than one colour.)

Go to "File", "Preferences", "File Format Preferences". Select the tab for the format you require. For GIF and PNG images, use "Set the transparency value to the background colour" if you want a transparent background, or "Do not save any transparency information" if you don't. For JPG images select the compression level you require. Remember that the higher the number the smaller the file but the more definition is lost. As a guideline, 10 is "high quality", 20 is "good" and 40 is "normal". You probably won't want to go any higher than 40, but feel free to experiment to discover just what the effects of changing this number are. Use another program (e.g. your web browser) to check the look of the file, otherwise you'll have to close it and then re-open it again in Paint Shop Pro, an action which cannot be undone.

Finally do "File", "Save As", enter a name, select the file type you want. Some file types have sub-types. For GIF images, use GIF89a. For GIF and PNG interlaced images are usually best. For JPG, progressive encoding is better, although some older applications can only understand standard encoding - if your favorite JPG viewer doesn't understand progressive JPGs, either save with standard encoding or get a new viewer. If you come across what you think is a broken JPG, try loading it with Paint Shop Pro - if it loads fine in that you need a new viewer.

Don't save an image as a JPG, load it again, edit it and then re-save it as this will result in a loss of image quality (much like copying a video tape over and over again). Instead always work from originals, do all your editing and then only save as a JPG when you want to publish it, send it over email or whatever. If you think you might want to edit it at some point in the future, save another copy in a lossless format such as PNG and then open that when you come to do the editing.

We have mostly been talking about colour images. What about monochrome? Well, the first thing you want to do is use Paint Shop Pro's "Colour", "Gray scale" function to ensure that the computer knows the picture really is black and white (you can do this at any time between aquiring the image and decreasing the colour depth.) You should now have a picture of 256 colours (all of them shades of grey) that you can save as a JPG (if it's a photograph) or a GIF or PNG. Monochromatic pictures suffer much less from being converted to 16 colours (shades of grey) than colour pictures do, so try doing this to see how it looks (unless you're saving in JPG format).

Finally, a word about importing pictures into Microsoft Word (similar advice may apply to other word processors but I haven't experimented with those). Some word processors, such as Microsoft Word 6, store pictures in uncompressed format when a document with embedded pictures is saved (leading to very large DOC files). Some (e.g. Word 97) save the embedded pictures in the same format they were originally saved in. Word 97 is preferred over Word 6 for this reason. Also for this reason, when using Word 97, don't use copy and paste to get the picture from Paint Shop Pro into Word. Although it's more fiddly, you'll get better results if you save the file using the advice given above, use "Insert", "Image", "From file" and select the file you saved. This will make your DOC files much smaller in just the same way that your image files will be much smaller. Remember that changing the size of the picture once it is in Word doesn't affect the size of the file, just the number of dots per inch once it is printed out. Again be careful to preserve the aspect ratio when doing this (i.e. only drag the corner resizing squares, not the ones in the middle of the sides).